Recently we had a unique opportunity to integrate a meter’s real-time status with ArcMap/ArcFM™. The goal was to provide the operators with the ability to “ping” a meter in the field and obtain its status. Integrating several systems like this can be tricky, but our client had all but one piece of the puzzle already in place. So, SSP was tasked with providing the final piece – getting the meter status in the hands of the users. Challenge accepted!
The were three requirements that had to be met. First, a user needed to be able to input a customer account or meter number. Secondly, there needed to be a way to get a meter status for a service location that the user had already been working with. Lastly, the user needed the ability to select several (configurable number) service locations on the map and be able to status them all.
- User-input Method
By clicking on a custom button in ArcMap, the user is presented with a dialog box and will enter either a meter number or a customer account number.
After performing the single meter status search, the results will be populated in the Status area of the dialog box. There are several responses from the meter status search web service that can be returned. Generally we would receive either an “OK” or a “Request timed out” message. - Right-click on ArcFM™ Attribute Editor
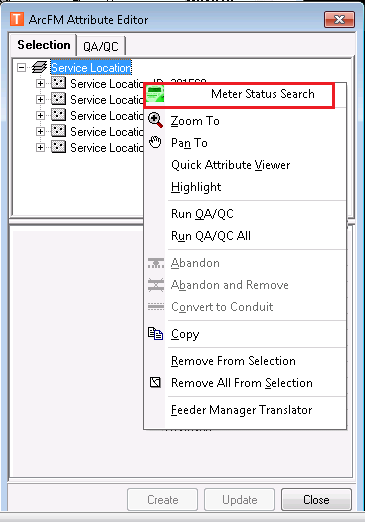
When users are viewing selected features through Schneider Electric’s ArcFM™ Attribute Editor, a simple right-click on the feature allows a single meter status to be performed.
Selecting the service point from the tree will run the single meter status search and subsequently populate the dialog box shown in Requirement 1 with the meter status. - Graphical
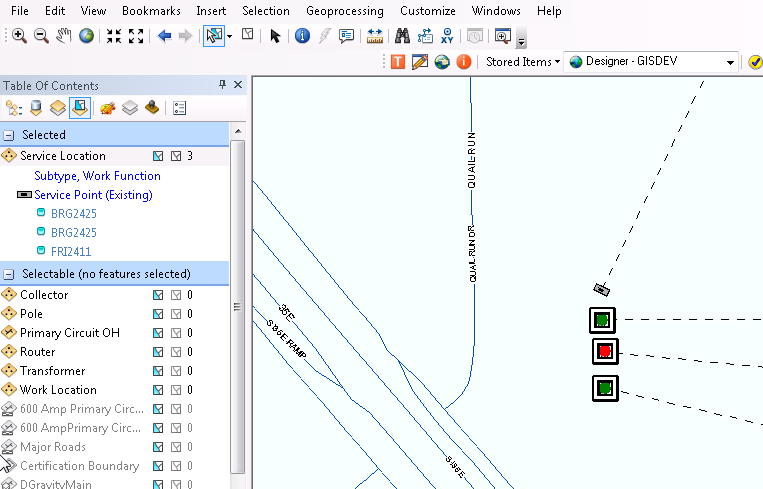
A user can select service points from the map and perform a meter status search for each selected point. A new graphical layer will be added that shows either a green (successful meter ping / “OK” response) or red (any other status message) ball.
Currently these searches are sent sequentially to the web service for status. When all are statuses are obtained, the screen refreshes with the appropriate status ball. Any “non-OK” response will be gathered up and displayed to the user in a notification dialog. All of the events are also sent to a log file for trouble-shooting purposes.
In the end, this turned out to be a nice little tool for the end-user. We did identify some additional items to tweak after the users had time to use this tool on a daily basis, which is usually the case.
We thought we would share this with our wider audience, so that you can begin thinking about additional ways to extend your data to your users. Thanks for reading!

What do you think?