[By G.I. Ess]
I’ve got a problem.
My desktop computer crashed yesterday and I am still waiting for the IT department to rebuild it. Now, my supervisor asked me to gather data about our poles because the supplier informed us there are issues with some of them. What am I going to do without all my desktop tools?
I guess it is time to start using ArcGIS Online. We had it set up but I never had the time to explore it. I knew it could serve up maps that were published by others in my department, but that’s about it. Here is my story about how I used ArcGIS Online and the steps I took to get that pole data to my supervisor, right-quick.
There are several easy-to-use and powerful features right at your fingertips with ArcGIS Online, so I figured that there would be an easy way to search my pole data. In fact, I knew if I got it set up, I could also view it on various devices. My supervisor has an iPad – maybe he could quickly perform the searches on the pole data himself and get the answer even quicker. How cool would that be?
Getting Started
The first thing I did was bring up my existing pole map. OUCH – look at all that data!
Next, I opened it up in ArcGIS Explorer Online.

Before I get started, I wanted to configure the map for just the pertinent data that I wanted to see for this task. So I quickly set up the attributes I wanted to see (pop-up) such as Manufacture Date, Height, and Material.
You can do this by drilling down into the layer, clicking the “Configure Pop-ups” button, then clicking on the “Configure…” button.
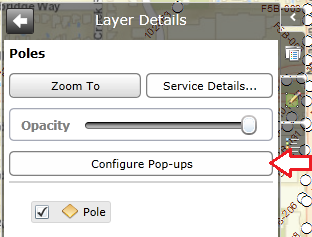
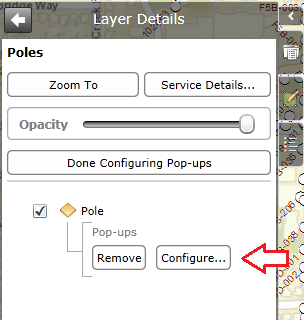
Check the attributes you want to display and then click “OK“. Now, quickly test it out by clicking on a pole in the map.
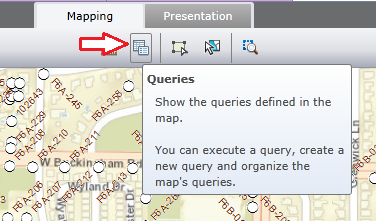
I’m now ready to get cracking with the queries, so I click the Queries button.
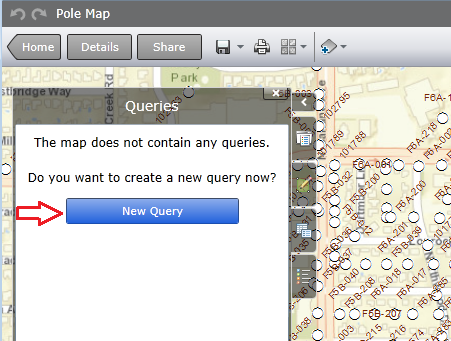
Since I didn’t have any previous queries defined for this map, I needed to press the “New Query” button:
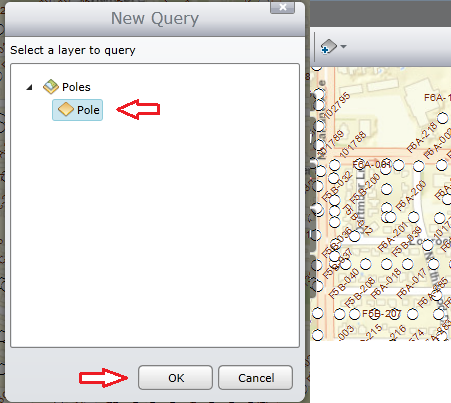
Next, I was prompted to select a layer to use in the query. So I selected the pole layer and pressed “OK“:
Setting Up the Query
I was then presented with the Query Definition window – I prefer to call it a query builder. At first, this looked familiar to me, so I went and quickly checked out the SSP ArcGIS Online Filter article.
Though the basic definition setup was similar (field, operator, value, and prompt) there were a few more options, and I’ll explore them as I go.
[As a side note, it would have been nice to search my data for a specific manufacturer of the poles in question. However, even though we have an attribute for that, it has never been populated in our GIS. We do know some specific attributes that we can use in the searching to discover them though, and that is the purpose of this exercise.]
Now let’s build a query to find the poles! I was told to report on the steel poles that were manufactured between 1970 and 1975.
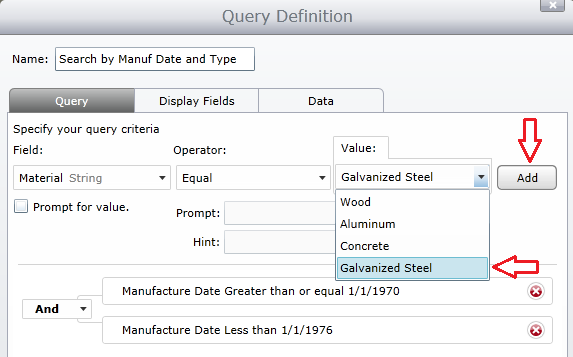
I am going to fill out the date values for first criterion, click “Add”, then add the second date. You can see this in the screen capture below:
Next, I will add to the search for the material type of steel. When I select the Material field, the Query Definition tool automatically knows that it is using a domain value and presents me with a drop-down of the values found. I will choose the Galvanized Steel value and press “Add“:
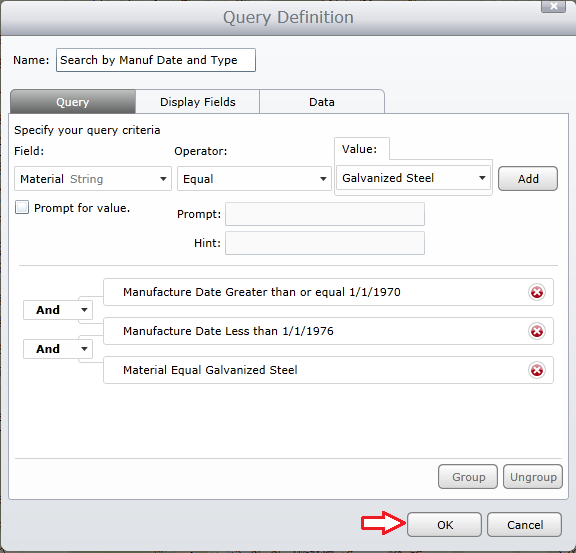
Before we execute this query, we need to take a quick look at the second tab in the Query Definition named “Display Fields“. By default, the fields that are displayed as a result of the query include everything.
So we will change the visible fields as well as the “Display Field” so we can show something more meaningful on the results panel. (Make sure you include the field selected in the “Display Field” drop-down or else you will not see the value on the results pane.)
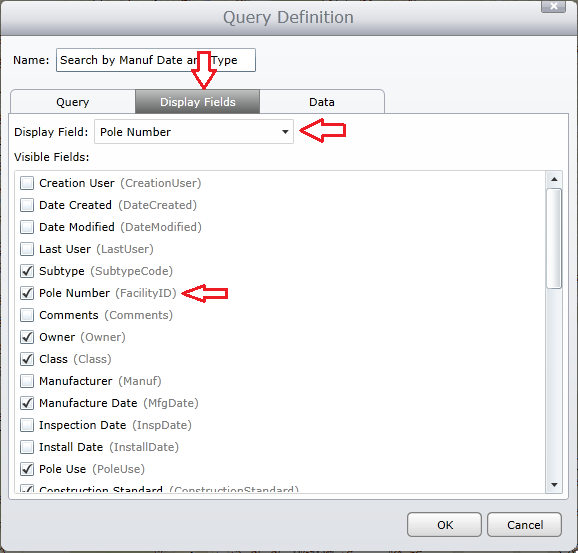
Now press “OK” to see the results. The query produced a result set of 63 poles from a total of just over 20K.
By clicking on the “>” on the result record, you will see the attributes that were configured earlier.
At the bottom of the Query Results, you will see a “Zoom To” link – click it and you will navigate to the pole that you were viewing in the results set.
One Step Further…
I am off to a great start finding my data all through ArcGIS Online tools. But there’s always more to explore.
If you noticed in the query builder, there was an option to ask the user for input. To get there, click the “Organize” button on the Queries panel. Then click on the Properties button.

If we revisit the query definition, we can add a new parameter for pole height. This time we will check the “Prompt for value” option so we can ask the user what height they want to search for.
This will eventually be useful in the field since we may want some inspection crews to work with different types of poles. (More on that later.) Click the “Add” button to save it to the query.
Resulting criteria for the query:
When I press the “OK” button I will now see the following prompt:
I will leave it at 65 and this time my query produced 3 results. Now, I know that this is working properly, but the data seems off.
When I view my data tabularly (from the About…ArcGIS Online – Exploring Data Tabularly article) I know there are plenty more poles in my dataset. However, some of the data that I am searching on comes from the Pole Length attribute.
Armed with this information, I am ready to take my query to the next level and get the results I am looking for. I will add the pole length attribute and prompt the user for a value, then select the two query criteria, group them together, and make it an OR operator as shown below:

Now when I click “OK” I will see the two user prompts:
Now my result set contains 57 records. That’s much better!
Taking It To The Streets
Having tools like those found in ArcGIS Online allows you to think out-of-the-box more easily.
After conquering my original task, I now want to share this out to the field of iOS users. This will allow them to search for poles based on some user-input criteria and be able to find them on the map quickly.
Now they are empowered to work with the data, and I can take a vacation day every now and again.
I am going to change the pole material type to one that asks for user input, so we can also use this for wood poles. I will then save and share this out to my ArcGIS Online group. Here is the Share dialog:
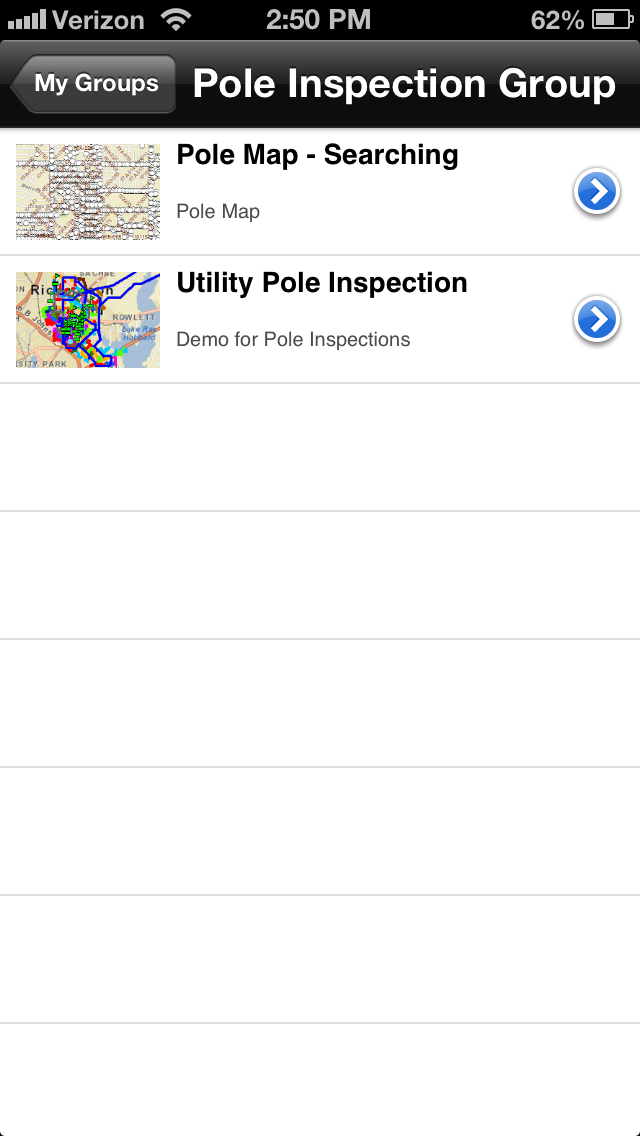
Now I am ready to go! I will log into the ArcGIS App on my iPhone and navigate to my Pole Inspection group page (that’s where I shared it to in the above step).
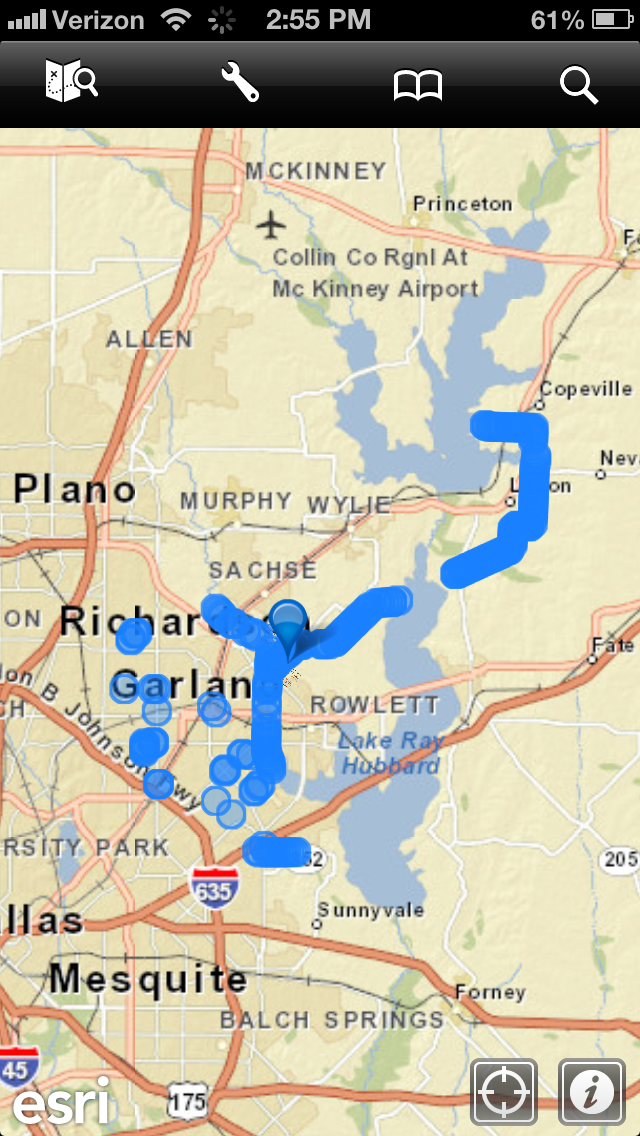
After the map loads, I will touch the Search icon, enter my search parameters and check out the results.
Change to the Pole Inspection Group
Default View of the Poles Map
After Clicking The Search Icon, Choose the Search
Search Screen Input
Search Results Screen
Choose a search result
Click on the location and get more detail
Conclusion
I have outlined and demonstrated how to create custom searching using ArcGIS Online tools. Not only was I able to accomplish my initial task of searching for pole data, I was able to extend that idea into a shared web map that can now be used by our field crew. This enables our users to be more self-sufficient and puts the power of our data into their hands.
Hopefully now I can get that vacation day! Thanks for reading.


Don Pritt says:
I just ran across this slightly dated blog and this is very helpful in what I’m trying to accomplish in regards to searching my attributes in my online subscription map.
I noticed that your poles are displaying attribute labels on what looks like a GIS online Map, how did you accomplish this?
I’m trying to do this with my water valves.
Thanks,
DP
Jeff Mertz says:
Thanks for your reply to the article. We’re glad that people are finding them! Basically any attributes exposed in your desktop map when it is published will be available to you in the online map. As the article describes, you can then decide which ones to show in the Query Definition / Display Fields tab. Hope that helps!